In a world where time is a precious commodity, and culinary aspirations run high, the need for efficient and convenient cooking solutions has never been greater. Enter the Ninja Pressure Cooker, a culinary powerhouse to revolutionize your kitchen experience. With its cutting-edge technology and intuitive design, this versatile appliance promises to unlock a world of culinary possibilities while simplifying your cooking process.
Whether you’re a seasoned chef or an amateur home cook, these Ninja Pressure Cooker instructions will guide you through pressure cooking, enabling you to create flavorful, tender, and time-saving meals easily. Prepare to venture on a culinary adventure as we delve into the intricacies of harnessing the power of the Ninja Pressure Cooker.
Step 1: Ensure the Silicone Ring is Fully Seated
Before installing the pressure lid, make sure that the silicone ring is fully seated in the silicone ring rack. This ring is crucial in creating an airtight seal and locks in flavor and moisture. Double-check that the ring is properly seated before proceeding to the next step.
Step 2: Align the Raised Arrows
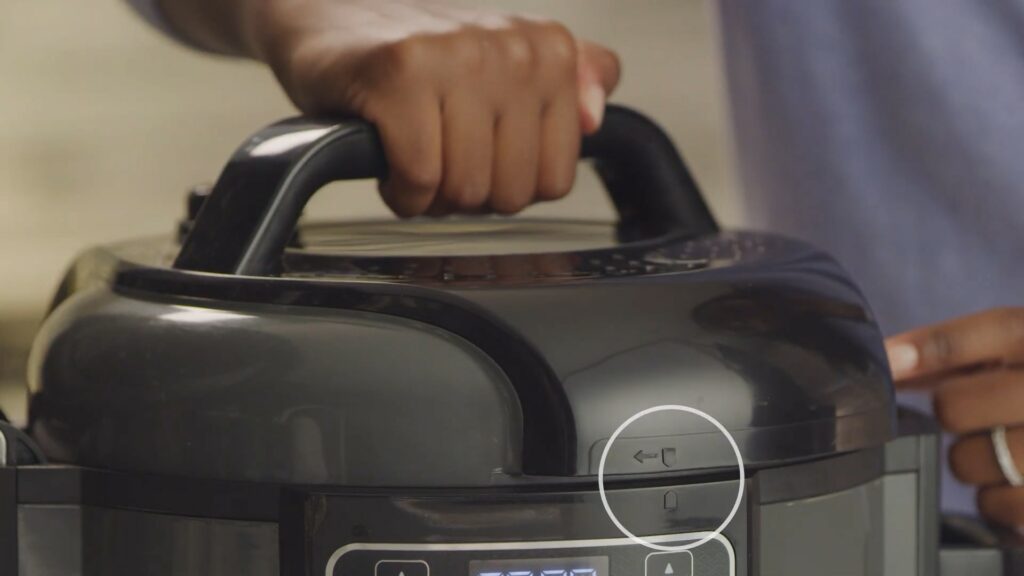
Align the raised arrow on your pressure lid with the raised arrow on your Foodi base. Once aligned, turn the lid clockwise until it locks into place. You know your lid is properly installed when the unit beeps and the four cooking functions illuminate on the control panel.
Step 3: Turn the Pressure Release Valve
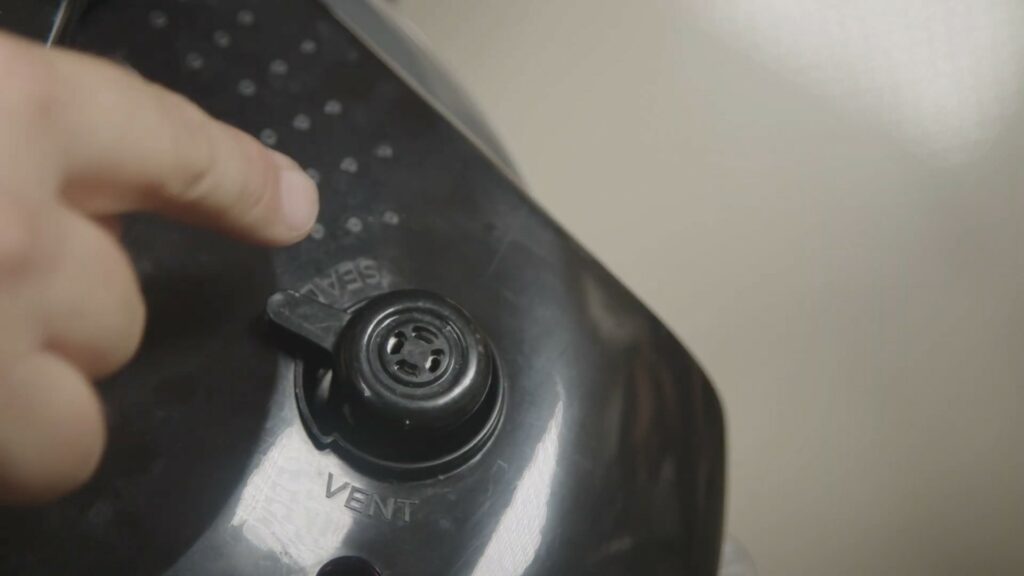
Turn the pressure release valve to the seal position to use the pressure function. Turn the valve to the vent position to use the slow cook, saute, or steam functions. This ensures an airtight seal, creating pressure and reducing cooking time.
Step 4: Start Cooking
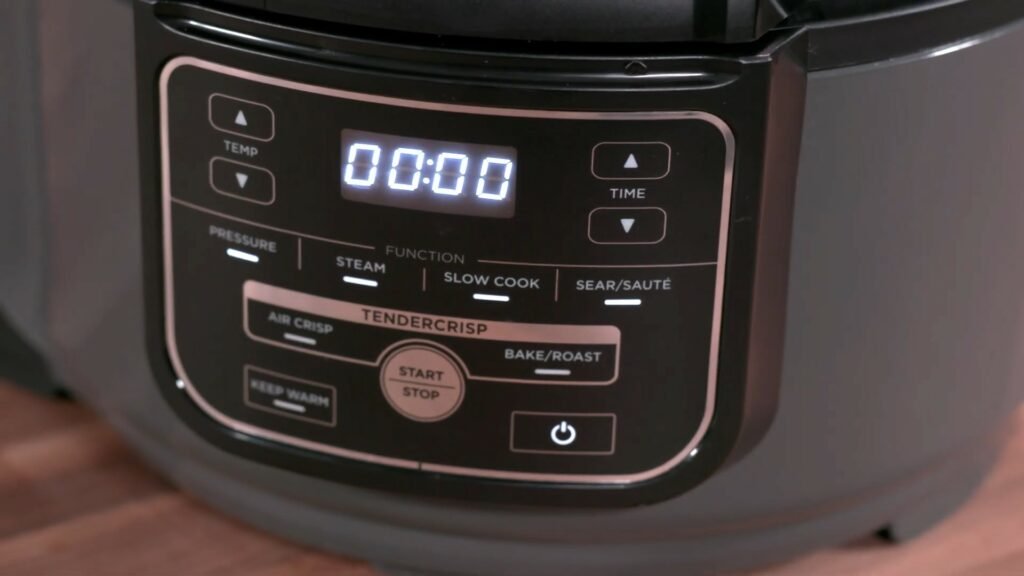
Now that your pressure lid is properly installed, it’s time to start cooking. With the Foodi pressure lid, you can instantly create quick, tender, and juicy meals. So, whether you’re cooking up a feast for your family or just looking for a quick and easy meal option, your Foodi pressure lid has covered you.
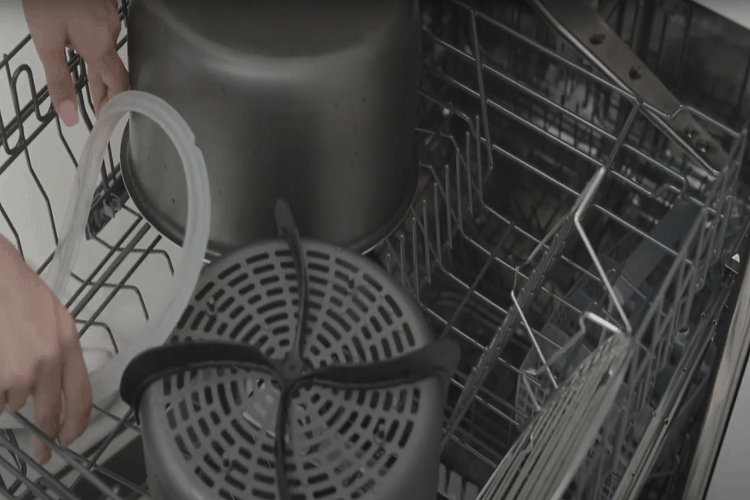
Keeping your equipment in tip-top shape is important. Regular cleaning and maintenance will ensure the longevity of your Foodi pressure lid and keep your meals flavorful and juicy time after time.
Conclusion
In conclusion, the Ninja Pressure Cooker is a versatile and efficient kitchen appliance that can revolutionize your cooking experience. Its user-friendly interface and wide range of functions make it suitable for both novice and experienced cooks.
By following clear instructions, you can easily create delicious meals in a fraction of the time compared to traditional cooking methods. The pressure cooking technology not only saves time but also enhances the flavors and textures of your dishes. Additionally, the safety features incorporated into the design ensure worry-free cooking.
Whether you’re a busy professional or a home chef looking to elevate your culinary skills, the Ninja Pressure Cooker is a must-have tool in your kitchen. So why wait? Enjoy this remarkable appliance’s convenience and taste by exploring the endless possibilities. Your culinary adventures await!
Check out OS401 Ninja® Foodi® Pressure Cooker – Owner’s Guide on Nina Kitchen Officla Website
FAQs
Q: How often should I clean my Foodi pressure lid?
A: It’s best to clean your pressure lid after each use. This ensures that it’s ready for the next time you’re ready to cook up something delicious.
Q: Can I use my Foodi pressure lid on all types of food?
A: While the pressure lid can lock in flavor and moisture for many types of food, it’s important to follow specific recipes and cooking instructions to ensure the best results.
Q: How do I know when my meal is done cooking with the pressure lid?
A: The Foodi pressure lid has a built-in timer to indicate when your meal is ready. Follow the instructions on the recipe or cooking instructions that came with your Foodi to determine the appropriate amount of cooking time.
