How to use Ninja Foodi pressure cooker is a simple and convenient way to cook various meals. The basic steps involve adding ingredients to the inner pot, selecting the pressure cooking function, setting the cooking time and pressure level, and allowing for natural or quick pressure release. (Also see How to Cook Rice in Ninja Foodi)
It’s important to follow specific recipe instructions for the type of food being cooked and refer to the manufacturer’s instructions for your specific Ninja Foodi. With a little practice and experimentation, the Ninja Foodi pressure cooker can become a versatile and reliable tool in your kitchen. (Also see Everything You Need to Know About The Ninja Pressure Cook)
As someone who loves to cook and experiment with new kitchen appliances, I was excited to try out the Ninja Foodi Pressure Cooker. In this guide, I’ll share my experience and tips on using Ninja Foodi Pressure Cooker to make delicious meals easily.
How Much Water in Ninja Foodi Pressure Cooker
The amount of water you should add to your Ninja Foodi Pressure Cooker will vary depending on your recipe. However, as a general rule, adding at least 1 cup of liquid (such as water, broth, or sauce) to the pressure cooker is recommended to ensure enough steam to build pressure and cook your food properly.
It’s important not to overfill your pressure cooker with liquid, which can cause the contents to boil and create a mess. Always refer to your recipe for instructions on how much liquid to add, and follow the manufacturer’s instructions for your particular Ninja Foodi Pressure Cooker model.
Ninja Foodi Pressure Cooking Times Chart
Here is a table of Ninja Foodi pressure cooking times for some common ingredients:
| Ingredient | Cooking time (minutes) | Pressure Release Method |
|---|---|---|
| Chicken breast | 6-8 | Natural release for 5 minutes, then Quick Release |
| Brown rice | 22-25 | Natural release for 10 minutes, then Quick Release |
| Hard-boiled eggs | 5 | Quick Release |
| Potatoes | 12-15 | Quick Release |
| Beef stew | 25-30 | Natural release for 10 minutes, then Quick Release |
| Chili | 10-15 | Natural release for 5 minutes, then Quick Release |
| Lentils | 15-20 | Natural release for 10 minutes, then Quick Release |
It’s important to note that these times may vary based on factors such as the size and thickness of your ingredients and your specific Ninja Foodi Pressure Cooker model. Always refer to your recipe for specific instructions on cooking times and pressure release methods.
Ninja Foodi Water Test: How to Ensure Your Pressure Cooker is Working Properly
The Ninja Foodi Water Test is a simple yet important step to ensure your pressure cooker works properly before using it for the first time. This test involves adding water to the pressure cooker and checking for leaks or malfunctions.
To perform the water test, remove the pressure cooking lid and set it aside. Next, add 2-3 cups of water to the inner pot of your Ninja Foodi Pressure Cooker. Place the pressure cooking lid back onto the pot and lock it into place. Make sure the valve on the pressure cooking lid is set to the SEAL position.
Set your pressure cooker to cook on high pressure for 2 minutes. It should take a few minutes for the pressure to build up inside the pot before the cooking starts. Once the cooking time has ended, allow the pressure to release naturally for at least 10 minutes before opening the pressure cooking lid.
If everything looks good, then your Ninja Foodi Pressure Cooker is ready to use for cooking your favorite dishes. Carefully remove the lid and check for any signs of leaks or malfunctions. If you do notice any issues, contact the manufacturer for further assistance.
Ninja Foodi Pressure Cooker Instructions
Using a Ninja Foodi Pressure Cooker can initially seem intimidating, but it’s quite easy once you get the hang of it. Here are some basic instructions for using a Ninja Foodi Pressure Cooker:
- Ensure your pressure cooking lid is properly locked onto the pot and the valve is set to the SEAL position.
- Add your ingredients to the inner pot, ensuring not to overfill it. Adding at least 1 cup of liquid is recommended to create enough steam for pressure cooking.
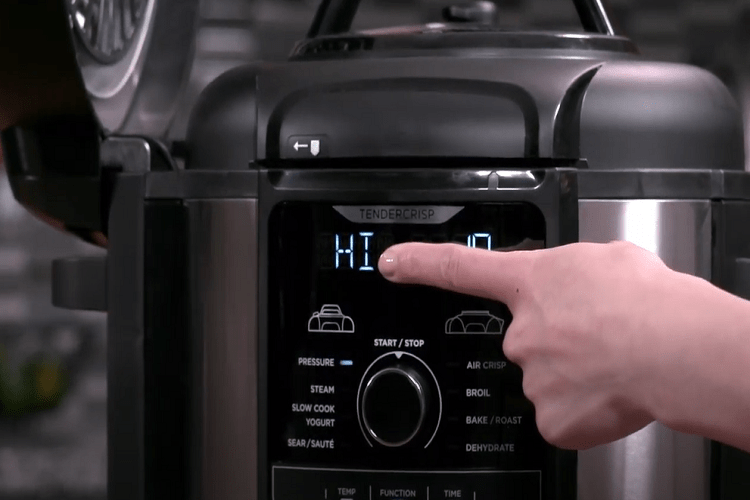
- Select the pressure cooking function and set the cooking time according to your recipe. The pressure cooking time will vary depending on the ingredients and the quantity you’re cooking.
- Wait for the pressure cooker to come to pressure. This can take a few minutes, depending on the recipe.
- Once the pressure cooking time is complete, release the pressure using either the natural release method (allowing the pressure to release on its own) or the quick release method (manually releasing the pressure using the valve).
- Open the pressure cooking lid carefully and enjoy your perfectly cooked dish!
Always refer to your recipe for instructions on pressure cooking times and methods, and follow the manufacturer’s instructions for your specific Ninja Foodi Pressure Cooker model.
Ninja Foodi Natural Release vs. Quick Release
When using a Ninja Foodi Pressure Cooker, there are two methods for releasing pressure: natural and quick.
- Natural release involves allowing the pressure to release independently, without any intervention. This method is best for dishes that are more delicate or prone to overcooking, such as seafood or certain vegetables.
- After the pressure cooking time is complete, let the pressure cooker sit for a specified amount (usually 5-10 minutes) before opening the pressure cooking lid. The pressure will gradually release on its own during this time.
- On the other hand, quick release involves manually releasing the pressure using the valve on the pressure cooking lid. This method is best for less delicate dishes or requires a shorter cooking time, such as hard-boiled eggs or potatoes.
- To quickly release the pressure, carefully moves the valve to the VENT position, allowing the pressure to release rapidly. It’s important to keep your hands and face away from the steam during this process.
*Note Always refer to your recipe for specific instructions on which pressure release method to use and follow the manufacturer’s instructions for your particular Ninja Foodi Pressure Cooker model.
